Instructional guide
Your instructional guide to navigate you through the usage of the QR Feast platform
Thank you for being part of our community.
If you have any questions, please contact us .
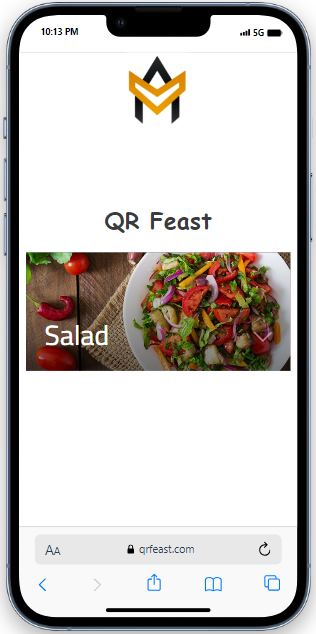
Accessing the platform
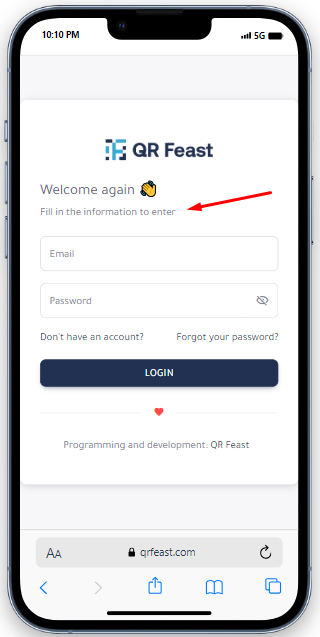
You click on the button indicated in the image below, and then the two boxes for entering your email and password will appear in front of you to log in to that platform
Platform Services
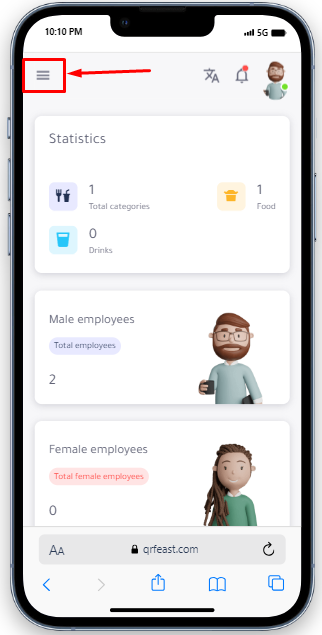
After logging into the platform, the main screen will appear. You click on the side icon to display the platform's services, use them, and benefit from them. After clicking on it, a menu of those services will appear in front of you.
How to use services
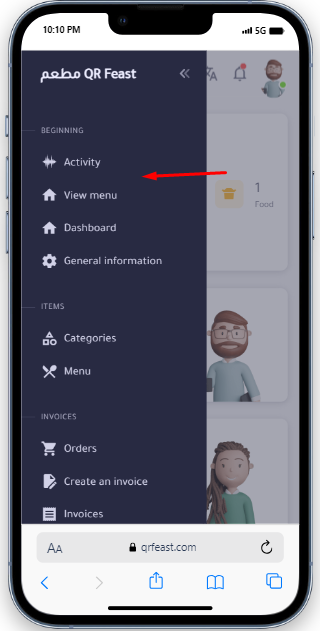
After clicking on the triple icon and the services appear in front of you, you will find that these main services include :
-
Activity
- This feature allows you to view new notifications related to customer orders, orders ready for delivery, and orders being prepared. The waiter can see the orders ready in the kitchen through this feature. If a table wants to call the manager, the notification will reach the operations icon.

-
Menu
- Through this service, the restaurant owner can see the items they have added, prices, names, and know which items the customer sees, etc
-
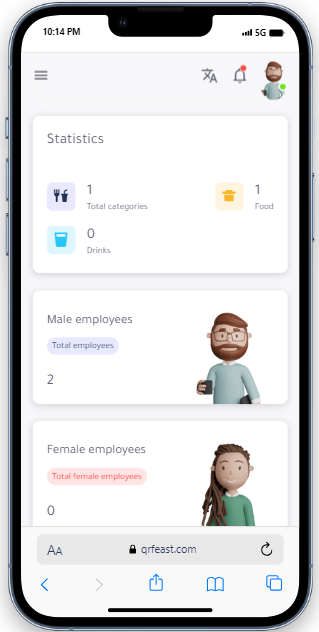
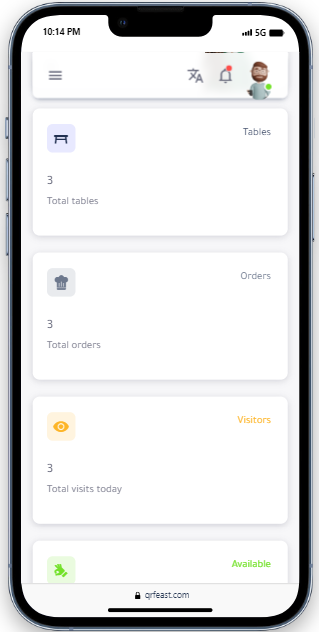
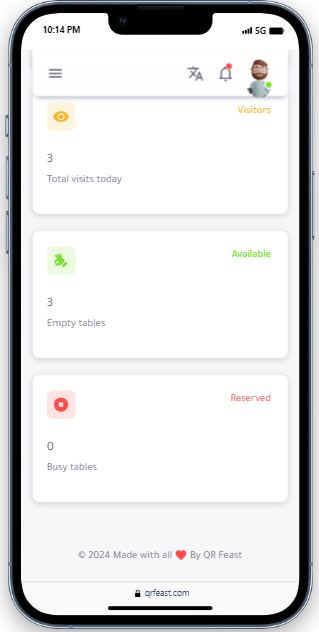
Dashboard
- This icon allows you to view general statistics in the restaurant, arranged in a vertical column as shown below, such as the number of male and female employees, occupied and vacant tables, total orders per day, total food and beverage sales, and remaining items.
-
-
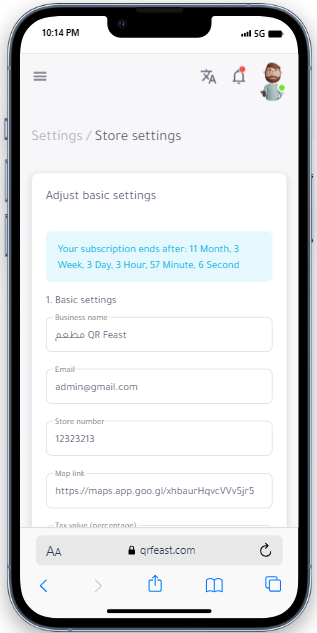
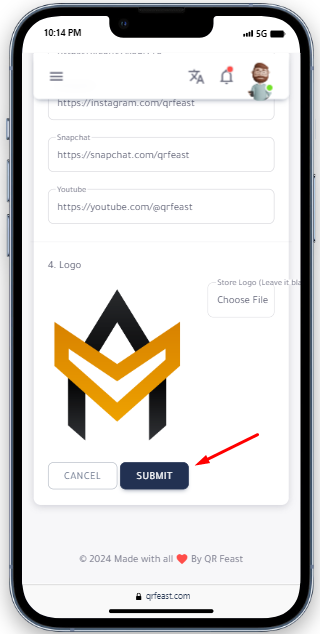
Settings
- This service allows you to adjust the basic information for your platform and restaurant. It includes the ability to edit the business name, email, store number, map link, and tax rate if applicable. It also contains links to your YouTube, WhatsApp, and other websites, and the ability to choose your restaurant logo by clicking on the file selection button, then clicking on the Submit button to save your modified information.
-
-
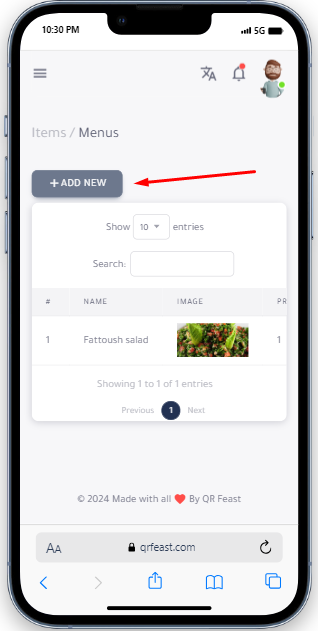
Items (Categories and Menu)
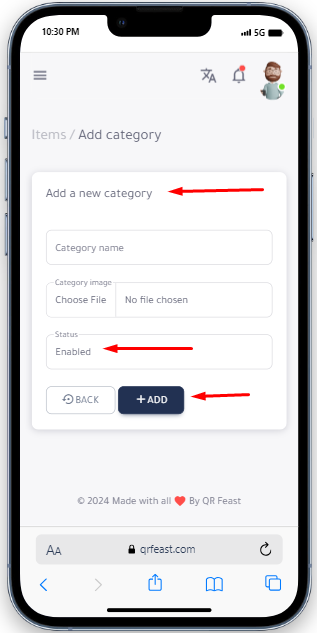
- Categories: This service enables the restaurant owner to add food categories and their respective items, which are then automatically added to the menu we previously discussed, by clicking on the "Add New" button as shown below.
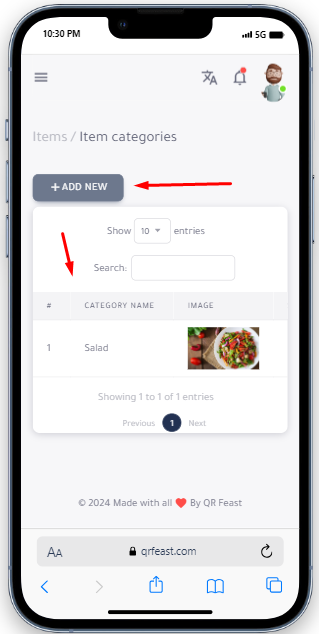
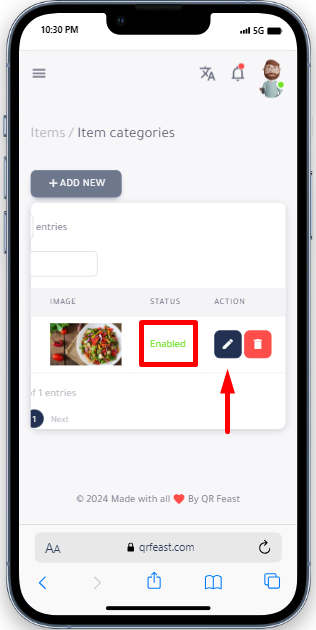
- It should also be ensured that the word "Active" is written next to the added category to confirm the success of the process. If it is not active, meaning "Hidden," the item will not appear on the menu. There is also an option for deletion or modification if desired later on
- When clicking on the "Add New" button, the options shown in the image below will appear, where you can add a main category to the menu such as "Beverages" and attach an image to the category. Then, ensure that the button is activated and click on "Add" to confirm, or "Cancel" if you wish to delete the action
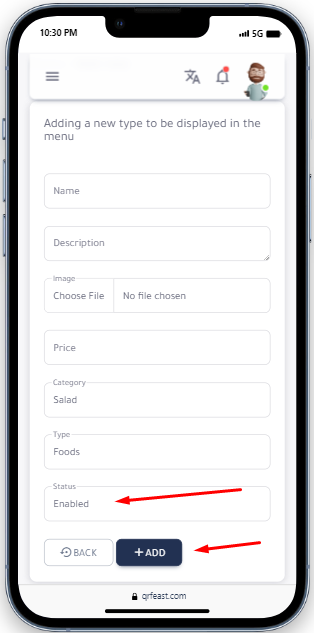
- Menu:Through this service, you can add all the subcategories belonging to the main category using the "Add New" button, such as "Shawarma," and add its types (Veal, Italian, Beef, etc.), along with adding the price and images
- After clicking on the "Add New" button, the following options appear: name, description, selecting an image for the category, price, and adding the item to which the category belongs, such as "Tabbouleh belongs to the salad category," and specifying whether the item is a beverage or food. Ensure that the status is active, and click on "Add" to add it to the menu or "Cancel" if you wish to cancel.
-
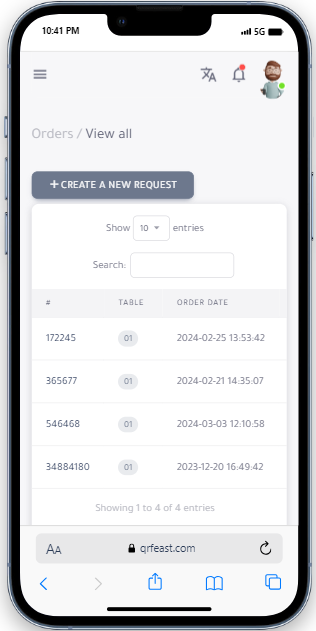
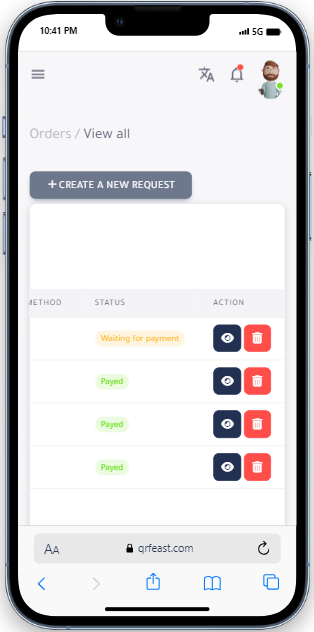
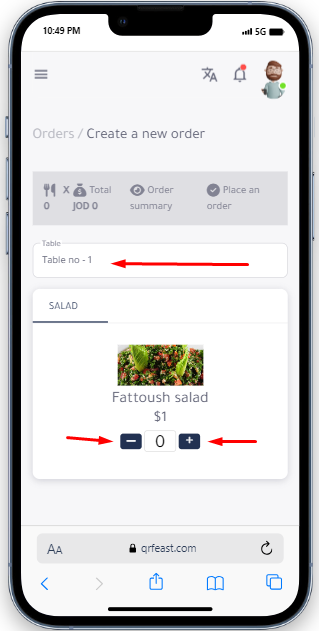
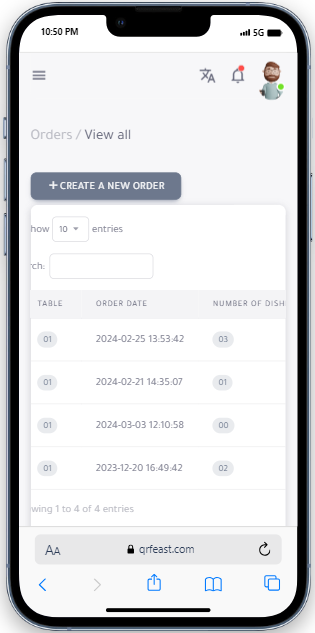
Orders
- Through this service, the accountant can add orders, and the customer can, by clicking on the "+" or "-" button, add dishes and specify the quantity, add their table number, and select the payment method (Visa/Cash). Additionally, this service includes the order date, hour, and minutes. In this case, paper orders will be eliminated as they operate on the same system but within the platform.
-
-
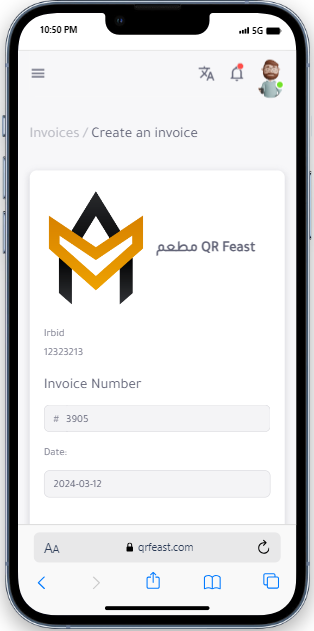
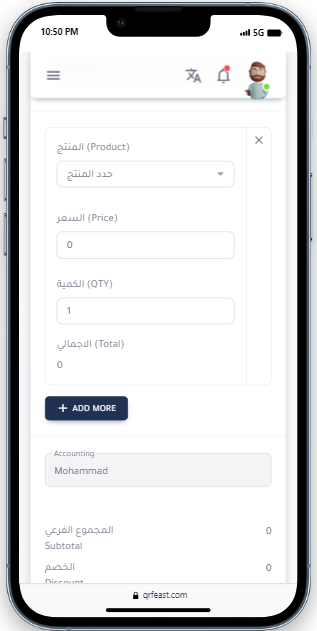
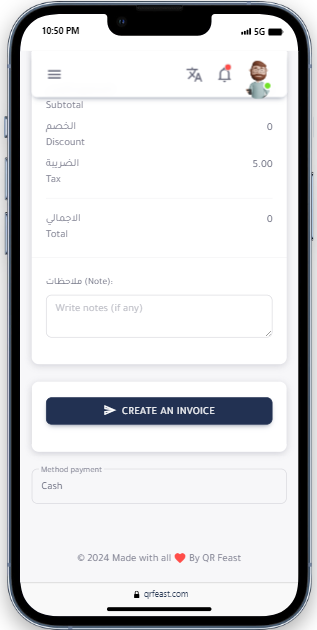
Creating an Invoice
- This service is provided for the cashier (accountant), where it helps reduce the restaurant's cash expenses, especially for dine-in customers (external orders). The accountant enters the order details through the invoice service, which includes all the information found in a traditional invoice such as the total, discount, date, invoice number, quantity, tax, payment method (cash or Visa), and a box for notes if available. Then, click on the "Create Invoice" button.
-
-
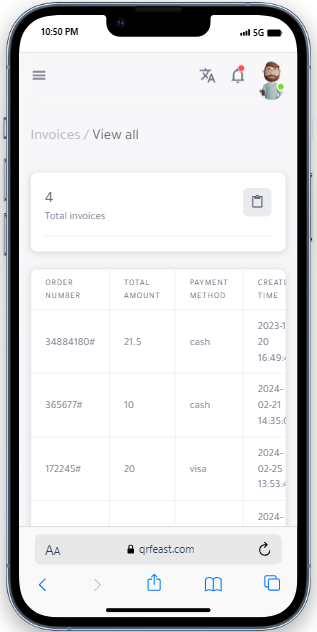
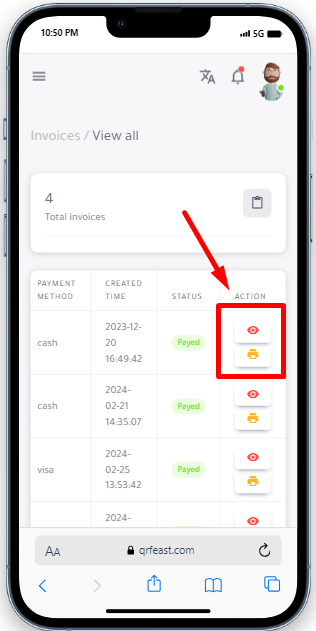
Invoices
- After clicking on the "Create Invoice" button at the top, all invoices will be moved to this section (Invoices), along with all their information. It contains several fields, including order number, total amount, payment method, date and time, payment status, and other actions. You can view the full invoice by clicking on the eye icon and print the invoice by clicking on the print icon.
-
Management
This section is specifically intended for the restaurant/cafe owner.
-
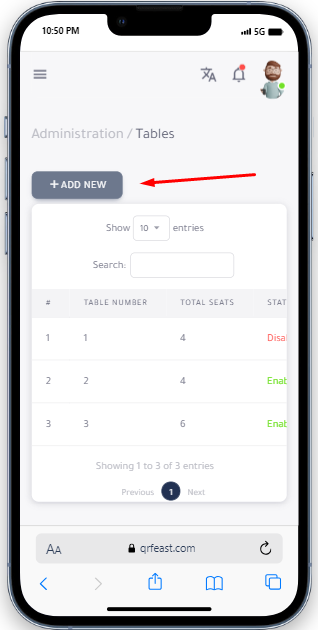
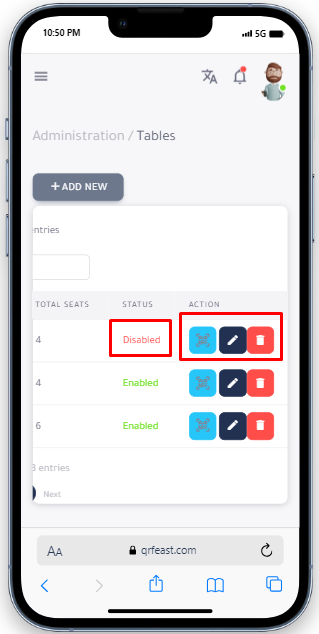
Tables
- In this option, you can add the tables available in the restaurant's dining area by clicking on the "Add New" button. You can specify the number of tables, the number of chairs, and the table number. Additionally, you can indicate whether the table is active or inactive. There are also three options you can perform (QR code) ,this allows customers to reserve their table, which remains reserved for an hour and a half from the time of booking, and no one else can reserve it as long as it is booked from a specific device.
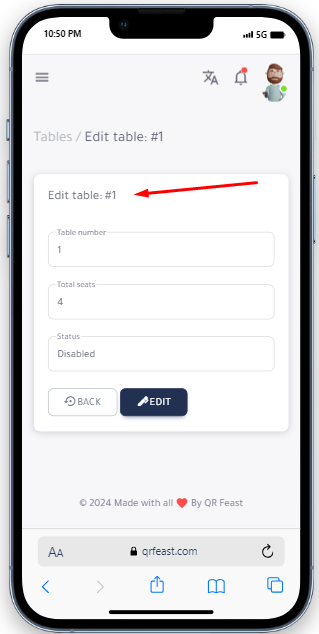
Edit: you can edit table information by clicking on the pencil icon, which will display the options shown in the third image below. Here, you can edit the table number, number of chairs, and status, and then click on the "Edit" button. Additionally, there is a delete button if you wish to cancel these actions and information -
-
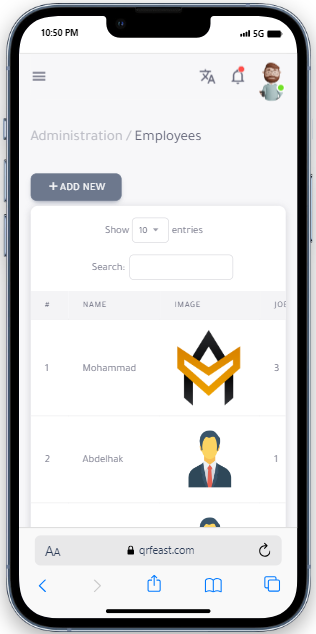
Employees
- In this option, you will see the names of the employees and can add their pictures if desired. You can also add new employees by clicking on the "Add New Employee" button.
-
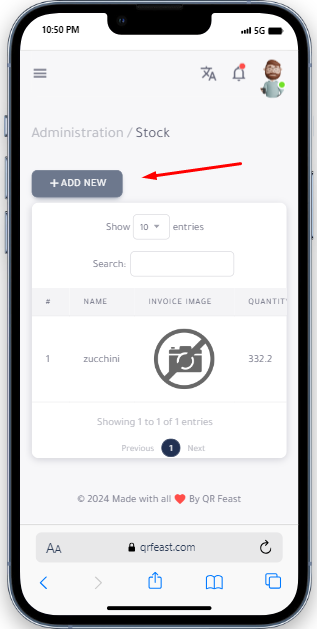
Stock
- The total inventory of items available in the restaurant is added here, and additional items can be added by clicking on the "Add New" button. Then, the added product's name, purchase invoice, available quantity, date of addition, and the option to delete or view the product invoice in full will appear.
-
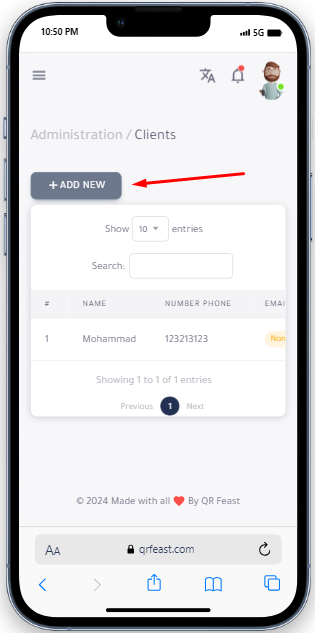
Clients
- Here, you can register the names of recurring customers who frequent the restaurant, where these customers accumulate points and receive rewards determined by the restaurant owner, such as obtaining a specific discount. This practice also enhances the restaurant's reputation because the project doesn't succeed without customers. Registering regular customers will be documented by clicking on the "Add New" button.
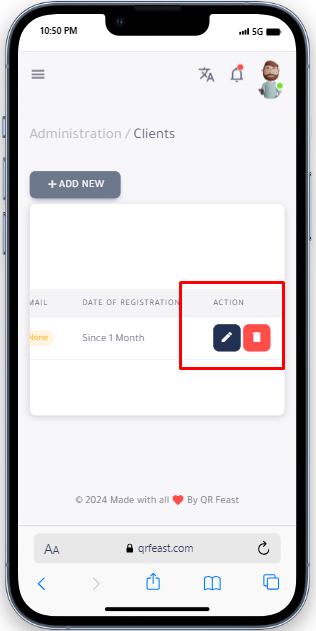
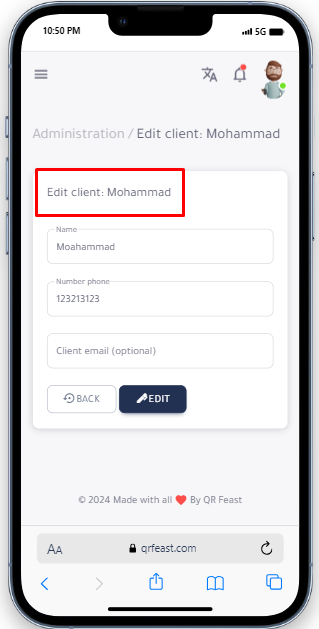
After that, the customer's information appears, including their name, mobile number, email address, and the registration date. Additionally, there is an option to edit the information by clicking on the pencil icon below. -
-
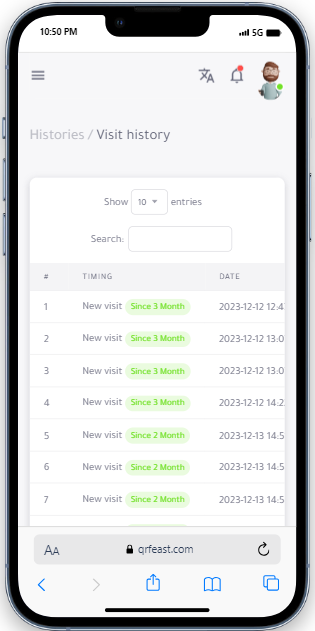
Visits history
- In this option, all visits will be displayed from the moment of registration on the platform until the end of your subscription (customer visit statistics), showing the timing and date of the visit
Enhancements
The development service contains additions to your store
-
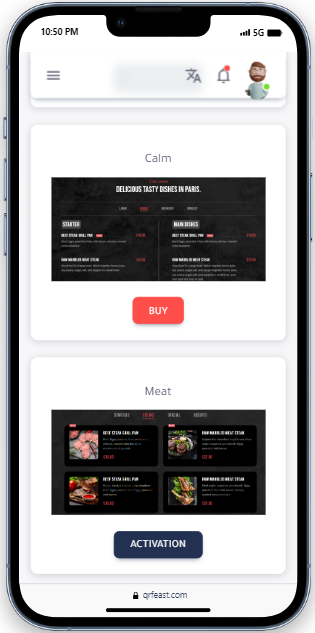
Templates Store
- This store contains various templates for the menu list, some of which are available for free and others require purchasing to become permanently available.
-
Add-ons Store
- Here you can get additional add-ons for your business on the platform. Some services are paid, while others are free.
The content was written by lawyer Rania Bani Atta